There’s a moment that happens in every great bar. The bartender grips the handle, tilts your glass with quiet confidence, and in about fifteen seconds delivers something that looks almost too good to drink. The head sits like a cloud. The color is perfect. The first sip makes you close your eyes. That moment didn’t happen by accident.
Pouring a beer from a tap is one of those deceptively simple skills that rewards the people who actually study it. Whether you’re hosting a backyard keg party, tending bar at a local brewery, or finally pulling the trigger on a home kegerator, learning to pour a proper pint changes everything about how beer tastes, looks, and feels. This guide covers the full picture, from the physics of dissolved CO₂ to the science of glassware, with every practical tip you need to pour a pint that would make a certified cicerone nod in approval.
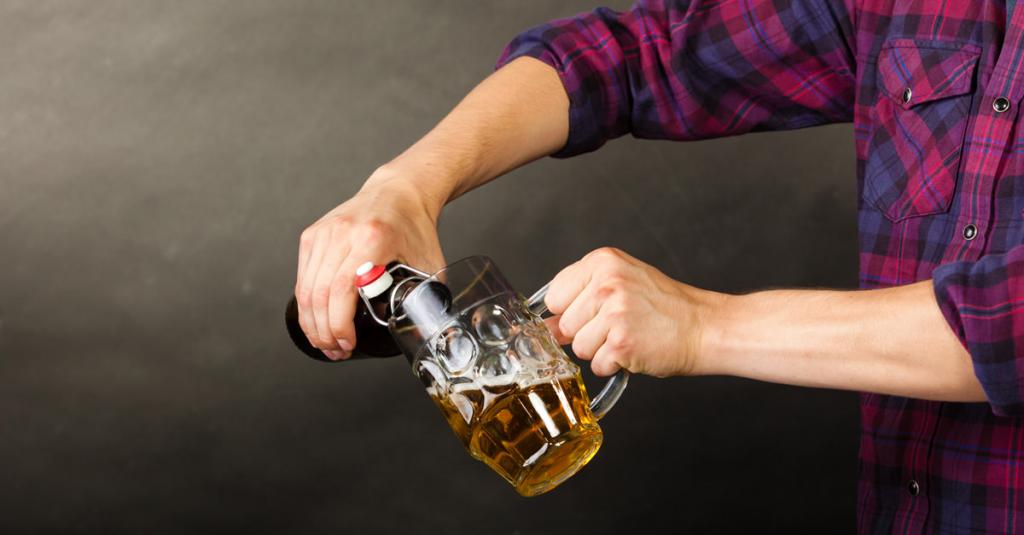
You Are Watching: How To Pour A Beer From A Tap Like a Pro Updated 07/2026

Why the Pour Actually Matters
Most casual beer drinkers assume the pour is purely cosmetic. It’s not. Every single aspect of how beer leaves a tap and enters your glass affects what you taste, smell, and feel.
Here’s what a well-executed pour actually does for you:
- Releases trapped carbonation so it doesn’t build up in your stomach during drinking
- Opens up the aroma, which accounts for the vast majority of what we perceive as flavor (studies show that 70–90% of flavor perception comes from smell)
- Creates the ideal foam head for texture, mouthfeel, and visual appeal
- Prevents “gushers”, the foam explosions that happen when carbonation is agitated incorrectly
- Reveals the brewer’s full intent, since most craft beers are engineered with a specific pour in mind
When beer is poured carelessly, straight down into a vertical glass with the tap half-open, you end up with a glass of fizz that tastes flat despite being overcarbonated. The aromas never escape. The mouthfeel is off. And ironically, the more foam you generate from a bad pour, the worse the beer tastes because the CO₂ has already blown off before you take a sip.
A proper pour releases trapped carbonation so you don’t get bloated halfway through the pint, opens up the aroma where most of the flavor actually lives, creates the ideal head for texture and presentation, and even makes cheap beer taste better and good beer taste incredible.
Understanding What’s Happening Inside the Keg
Before you touch the tap handle, it helps to understand what you’re working with. A keg of beer is a carefully pressurized system, and every decision you make as the person pouring directly interacts with that system.
The Role of CO₂
Beer contains dissolved carbon dioxide (CO₂) from fermentation, the bubbles that give beer its effervescence. When you pour beer, you’re releasing those bubbles. Some bubbles rise gently to create a smooth, creamy head. Too many bubbles too fast, and you end up with an overflowing mess.
The goal of a great pour is to control when and how those bubbles release.
Temperature: The Single Most Important Variable
The most common problem with a draft system is incorrect temperature. When the beer gets warm, it foams, and the retailer loses profits because foam is approximately 25% beer.
The gold-standard serving temperature for draft beer is 38°F (3°C). This applies to virtually all domestic and imported beers, pasteurized or not.
Beer stored at 38°F will retain the level of carbonation that was created during the brewing process. Allowing keg beer to warm up will cause the carbonation to be released from the beer while still in the keg, causing foaming.
The opposite problem is just as real. Beer that is too cold keeps too much carbonation locked in the liquid. When it finally hits your glass, it can over-carbonate and create an uncontrollable head.
A practical rule for home kegerator owners: a recently delivered keg is a common cause of a temperature problem. It is important to allow the keg to rest in refrigeration for a full day before dispensing. Never tap a freshly delivered keg and expect a clean pour.
Pressure: Dialing in the System
Most breweries in the U.S. recommend a CO₂ pressure between 12–14 lbs for ale and lager types of draft beers. This CO₂ pressure will maintain the level of carbonation specified by the brewery.
Different beer styles require different pressure settings. Here’s a useful reference:
| Beer Style | Recommended CO₂ Pressure |
|---|---|
| Ales (Pale Ales, IPAs, Ambers) | 7–13 PSI |
| Lagers | 10–14 PSI |
| Continental and Light Pilsners | 11–16 PSI |
| Wheat Beers, Belgian Ales, Sours | 15–20 PSI |
| Stouts (Nitro) | 35–38 PSI (nitrogen regulator) |
Too low a pressure will cause your beer to pour slowly, while too high pressure will cause your beer to pour too quickly, creating excessive foam. Having too high pressure for an extended period of time can actually cause your kegs to become overcarbonated, permanently leaving you with a very foamy keg that will never produce a proper yield.
Start Here: The “Beer-Clean” Glass
No pouring technique in the world can save a dirty glass. This is non-negotiable.
A “beer-clean” glass is one that has been thoroughly cleaned and rinsed so that it is completely free of oils, soap residue, dust, and leftover beer film. The reason this matters so much is chemical. Residue disrupts the surface tension that holds carbonation in the beer. Instead of rising neatly to form a proper head, bubbles cling to the sides of the glass and fizz uncontrollably.
In my opinion, the number one mistake most unknown to the common drinking community is the glass itself, more specifically, what it is cleaned with.
Here’s a simple test: rinse a glass with water. If the water sheets evenly down the sides, the glass is clean. If the water beads up or breaks into droplets, there is residue present. Another test: if you see tiny bubbles clinging to the inside walls of a poured beer, your glass is not beer-clean.
Pro tip: Rinse your glass with cold water immediately before pouring. Even seemingly clean glassware at home can have an invisible residue left by most common dish soaps that depletes some of the desired foam produced by beer. A cold water rinse clears any last traces and also chills the glass without freezing it.
One important warning from the experts: if you’re taking a glass out of the dishwasher, let it cool down. Pouring beer into a hot glass can cause it to essentially explode with foam.
How To Pour a Beer From a Tap: Step-by-Step
Here is the standard method taught by Cicerone-certified professionals, designed for use in busy service settings and at home alike.
Step One: Position the Glass at a 45-Degree Angle
Hold the glass at 45 degrees below the faucet. Keep the rim of the glass close to the spout but never touching it.
To follow the best hygiene practices, keep the glass and the beer from touching the faucet spout. Dirt, dust, or spilled beer on the outside of the faucet or bacteria inside the faucet can contaminate your beer.
The 45-degree angle allows beer to slide down the interior wall of the glass rather than splashing into an open pool of liquid. This controls how quickly CO₂ escapes, giving you time to build a clean, stable pour before you start generating foam.
Step Two: Grip the Tap Handle at the Base and Open It Fully
Grabbing from the base of the tap handle is proper practice, since pulling from the very top can more easily put excess pressure on the faucet and cause it to break more quickly over time.
Read More : Which Beer Is Good For Health In India Updated 07/2026
Once you’ve gripped the handle properly, open the faucet completely in one fluid, swift motion. This is where most beginners make a critical mistake. They open the tap slowly, thinking it will reduce foam. It actually does the opposite.
Anytime the faucet is partially open, beer will pour foamy.
A half-open faucet creates turbulence in the beer stream. The pressure differential causes CO₂ to violently escape, and you end up with a glass of nothing but foam. Open it fast, open it fully, and then control the pour through glass angle, not through how wide the tap is open.
Step Three: Pour Down the Side Until Two-Thirds Full
Let the beer flow down the side of the tilted glass until it is about two-thirds full. During this phase, you should see little or no foam developing. The beer should be running clear and smooth down the glass wall.
When pouring from a draft, it is best to allow the first ounce to flow from the tap before placing the glass. This is to clear the line of any old beer that may be the wrong temperature. This is especially important in bars and taprooms where draft lines might hold beer from the previous pour.
Step Four: Tilt the Glass Upright and Finish Down the Center
Shift the glass so that the stream of beer pours down the middle of the glass. Now you will start to generate a foam head on the beer as you finish filling the glass.
This is where the magic happens. Pouring into the center of an upright glass agitates the remaining carbonation deliberately, generating a controlled head of foam that sits at the top of the glass.
If you get too much foam initially, wait longer to shift to pouring down the middle on your next pour. If you get too little foam, pour down the middle sooner next time.
Step Five: Close the Tap When Foam Reaches the Top
About a half- to one-inch (1–3 cm) of foam head is typical for many beer styles. Close the faucet completely when the foam reaches the top of the glass.
Close it the same way you opened it: from the base, with a swift, complete motion. A partially closed tap as you finish will add turbulence right at the end and collapse your carefully built head.
The Foam Head: Why You Should Actually Want It
American drinkers have a complicated relationship with foam. Many people see a head on their beer as wasted space, something to avoid. Why do North Americans want beer without any head? I think Western culture lives in a world of always wanting more, and the visual of having beer with foam on top feels like they are being shortchanged. People want beer to the brim!
This instinct is wrong, and here’s the science behind it.
Foam is not wasted beer. It is active beer. The head on a properly poured pint serves several important functions:
- Aroma delivery: Foam traps and concentrates volatile aromatic compounds, funneling them toward your nose with every sip. Since most flavor perception is olfactory, this directly improves how the beer tastes.
- Carbonation regulation: A foam head releases CO₂ at a controlled rate, preventing you from drinking it all at once (which is what causes that bloated, gassy feeling).
- Mouthfeel and texture: The creamy texture of good foam adds a tactile dimension to the drinking experience, softening perceived bitterness and smoothing the palate.
- Freshness indicator: A beer with no foam at all often tastes flat and the presence of foam indicates proper carbonation. If you pour beer and it doesn’t develop any foam at all, you might want to check the beer expiration date.
The target is one-half inch to one-and-a-half inches of foam, depending on the style. Belgian ales and wheat beers warrant more foam. Crisp lagers and pilsners suit a tighter, thinner head.
Pouring Different Beer Styles from the Tap
Not every beer pours the same way. The standard 45-degree tilt method works for most styles, but a few specific types require a modified approach.
Nitro Beers (Stouts, Porters, Nitro IPAs)
Nitro beers use a blend of roughly 70% nitrogen and 30% CO₂, compared to traditional CO₂-only draft systems. Nitrogen is less soluble in liquid than CO₂, which creates smaller, creamier bubbles and a dense, cascading head.
Unlike their traditional draft counterparts, nitros contain around 70% nitrogen and 30% carbon dioxide. Because nitrogen is insoluble in liquid, the head and mouthfeel of nitro beers is rich, thick, and creamy.
For nitro beers:
- Hold the glass upright (not tilted at 45 degrees) directly below the tap
- Open the faucet completely and fill the glass to about two-thirds
- Watch the cascade: the nitrogen bubbles will appear to fall downward before rising, creating the famous “waterfall” effect characteristic of a Guinness pour
- Once the liquid settles and the foam has dropped, slowly top off the glass with a level head of dense, creamy foam about 1 to 1.5 inches thick
Guinness claims that the perfect pour for nitro beer takes about 120 seconds, or two full minutes. Don’t rush it. The settling process is part of the drink.
Wheat Beers and Hefeweizens
Wheat beers are rich in protein, so they tend to have a larger head on them. They also contain yeast, which should be evenly distributed throughout the beer. You can do this by gently rolling the bottle or can back and forth before opening it to pour.
When pouring from a tap, use the standard 45-degree technique but expect more foam and let it settle naturally. The tall Weizen glass is specifically designed to accommodate the extra head volume.
Bottle-Conditioned Beers
Bottle-conditioned beers should be stored upright. The yeast settled at the bottom should be kept out of the pour as much as possible. Stop pouring at the neck, and etiquette says to leave the remains with the customer, as some enjoy the taste alongside their beer.
Glassware: The Vessel Changes Everything
Choosing the right glass is not snobbery. It is science. Beer was perceived as fruitier and more intense when served in a curved-sided glass. Shape, rim width, thickness, and volume all interact with the beer in measurable ways.
The shape of the glass influences the concentration and release of aromas, the retention and formation of the beer’s head, the carbonation, and the way the beer interacts with the palate.
Here’s how the most common glass styles match up with popular beer types:
| Glass Type | Best Beer Styles | Key Benefit |
|---|---|---|
| American Pint (Shaker) | Lagers, Ales, IPAs | Versatile, easy to stack |
| Nonic Pint (British) | Ales, Porters, Stouts | Better head retention, comfortable grip |
| Tulip Glass | Belgian Ales, IPAs, Saisons | Traps aromas, supports thick head |
| Pilsner Glass (Flute) | Pilsners, Light Lagers | Showcases carbonation, maintains clarity |
| Weizen Glass | Wheat Beers, Hefeweizens | Accommodates large head volume |
| Snifter | Strong Ales, Barleywines, Stouts | Intensifies aroma, encourages swirling |
| Goblet/Chalice | Belgian Strong Ales, Trappist Beers | Wide opening releases complex aromas |
The tulip glass has a stemmed base that promotes swirling to agitate some flavors upward, making it a great choice for Belgian beers, complex beers that are high in alcohol, and dark beers like stouts and porters.
One fascinating study even found that drinkers rated identical lagers as 14% more flavorful and 22% more “premium” when served in branded, etched glass versus generic pint ware, even when blindfolded and told the glasses were identical. The ritual of the right vessel genuinely primes the palate.
Temperature also plays into glassware choice. Glass thickness and shape control how quickly a beer warms in your hand. A thick-walled mug or stein can insulate your drink, keeping it cooler longer, while a thin tulip glass allows body heat to warm the beer gradually. For high-ABV dark ales and barleywines, gentle warming over the course of a drink actually unlocks additional aromas and flavors.
Serving Temperature by Beer Style
Getting the temperature right at the glass matters as much as the keg temperature. Here is a guide that many professional bartenders and certified cicerones follow:
| Temperature Range | Style |
|---|---|
| 32–39°F (Very Cold) | Pale Lagers, Golden Ales, American Cider |
| 39–45°F (Cold) | Hefeweizen, Pilsner, American Dark Lager |
| 45–54°F (Cool) | American Pale Ale, Amber Ale, Irish Ale |
| 54–57°F (Cellar) | IPA, English Pale Ale, Brown Ale, Bock |
| 57–61°F (Slightly Warm) | Stout, Porter, Belgian Strong Ale |
| 61–65°F (Near Room Temp) | Barleywine, Imperial Stout, Barrel-Aged Ales |
The takeaway: colder is not always better. Serving a complex barrel-aged stout at near-freezing temperatures suppresses every aromatic compound the brewer spent months developing. Let it breathe. Let it warm slightly. The beer will reward you.
Draft Beer Line Cleaning: What It Has To Do With Your Pour
Read More : Beer Similar To Spotted Cow Updated 07/2026
This section applies to anyone with a home kegerator, a tap system at their bar or restaurant, or even a party keg setup. Clean lines are not optional.
Most dispensing problems can be traced back to improper temperature, pressure, or cleaning issues.
Components such as faucets, beer lines, and keg couplers should be cleaned every two weeks or with every keg change. Bypassing cleanings can lead to cloudy beer, off-flavors, and gunk buildup.
Inside draft beer lines, a biofilm called beer stone gradually accumulates. This mineral and organic deposit does not just cause foam. It fundamentally alters the flavor of beer passing through it, introducing sour, fruity, or musty off-notes. Regular cleaning with an alkaline line cleaner (and periodic acid rinse) is the only way to prevent it.
For home kegerator owners, a practical cleaning schedule looks like this:
- Every two weeks: Full chemical line cleaning with appropriate beer line cleaner
- With every keg change: Rinse and inspect the keg coupler, replace O-rings if worn
- Before every pour: Rinse the faucet exterior with cold water, inspect the spout for buildup
A clean system does not just pour better. It produces beer that tastes the way the brewery intended it to taste, every single glass.
Common Pouring Mistakes and How to Fix Them
Even experienced pourers fall into habits that compromise their pint. Here are the most frequent issues, and what they mean:
Problem: Too much foam from the start The faucet was opened partially rather than fully, or the beer temperature is too warm. Check that you are opening the tap in one swift, complete motion. Verify the keg has been chilled to 38°F for at least 24 hours.
Problem: No head at all The glass may not be beer-clean, or the beer may be too cold. Soap residue kills foam. If there is no foam, there is no aroma and definitely no flavor. Wash the glass again, rinse with cold water, and try pouring into the center of an upright glass earlier in the pour.
Problem: Foam immediately collapses This is a classic dirty glass signal. A proper head should hold for several minutes, forming what bartenders call “lacing,” the foam rings left behind on the glass as you drink. Collapsing foam means residue is interfering with surface tension.
Problem: Beer tastes sour or overly tart This typically indicates dirty draft lines. The beer is picking up off-flavors from biofilm or beer stone in the lines. Schedule an immediate line cleaning.
Problem: Beer is gassy and sharp on the palate If the beer looks like a pint of seltzer water with lots of small bubbles rushing up from the bottom of the glass, and tastes sharp and acidic, the CO₂ pressure may be set too high. When you combine CO₂ with water you get carbonic acid. Lower the CO₂ pressure by 1–2 PSI and reassess.
Problem: Beer comes out in a corkscrewing spiral Too little pressure applied to the beer will result in the beer pouring in a turbulent, corkscrewing fashion, causing a glass full of foam. Increase pressure slightly and confirm the faucet is fully open.
Draft Beer vs. Bottles and Cans: Why Tap Tastes Different
Many dedicated beer drinkers swear that draft beer tastes better than the same beer from a can or bottle. There’s a real reason for that perception, and it’s tied directly to the pour.
Drawing beer directly from a keg and into your glass involves carefully balancing pressure, temperature, and cleanliness. Draft beer enthusiasts argue that this method allows for a more controlled environment, minimizing the risk of external factors affecting the beer’s flavor. One of the key advantages of draft beer lies in its freshness. The beer travels a shorter distance from keg to glass, reducing the exposure to light and air that can compromise the taste of beer.
That said, the container matters more than many people realize. Beer in cans is actually better protected from light and oxygen than bottled beer, since aluminum provides a complete seal against UV rays. The skunky flavor sometimes associated with green or clear bottled beers results from light-triggered chemical reactions in the hops, a problem that sealed kegs and cans avoid entirely.
The real advantage of draft is freshness and pour control. A bar with clean lines, a well-maintained keg at 38°F, and a skilled bartender will serve beer at its absolute peak. But a poorly maintained draft system can make the same beer taste worse than a well-poured can. The system and the pour matter more than the container.
For the Home Bartender: Setting Up Your Kegerator
If you have invested in or are considering a home kegerator, these are the essentials to nail:
Temperature: Set your kegerator thermostat to maintain 36°F to 38°F inside the unit. Use a separate liquid thermometer placed in a glass of water inside the cooler (not just the built-in digital display) to verify accuracy.
CO₂ Pressure: Start at 12–13 PSI for standard ales and lagers. Adjust up or down by 1–2 PSI based on how your beer pours. Never change pressure to compensate for a temperature problem; fix the temperature instead.
Lines: Keep lines as short and level as possible. In general, 5 feet of 3/16-inch beer line per keg is a good starting point for a direct-draw home system. Longer or wider lines require higher pressure.
Allow Settling Time: A keg should not be tapped for 24 hours after it’s delivered, to give it a chance to settle and cool down before serving. Skipping this step almost guarantees the first several pours will be mostly foam.
Glassware Storage: Store your pint glasses at room temperature, not in the freezer. A frosted glass mutes aroma and flavor. Use the cold-water rinse technique instead for a chilled glass that still lets the beer sing.
The Art and the Science, Together
There is a reason that truly skilled bartenders make the pour look effortless. It is not that they have some secret move nobody else knows. It is that they have internalized a system: clean equipment, correct temperature, proper pressure, full tap opening, controlled glass angle, and a deliberate transition from side-pour to center-pour.
Every variable works in concert. You can nail the angle perfectly but ruin the pour with a half-open tap. You can open the tap correctly but serve foam all night because the keg is two degrees too warm. The skill is not in any one motion. It is in understanding how all the pieces fit together and making the right call for the beer in front of you.
Pouring a tap beer is both a science and an art, and people throughout history have been enjoying great pours.
That legacy belongs to anyone willing to actually pay attention to what they’re doing. The bartenders and cicerones who pour the best pints are not performing magic. They’re applying knowledge, respecting the beer, and caring enough about the person on the other side of the bar to get it right.
Conclusion
Here’s what separates a good beer drinker from a great one: the willingness to treat the pour as part of the experience, not a formality before the experience. The moment you tilt that glass, open that tap, and watch foam billow up like a slow-motion cloud, you’re not just getting a drink ready. You’re completing the last step in a process that started with farmers growing barley, brewers crafting recipes, and kegs traveling hundreds of miles to reach your tap.
The perfect pour isn’t about showing off. It’s about respect: for the beer, for the craft, and honestly, for yourself. Because nobody who genuinely loves beer should accept a flat, flavorless, over-gassed pint when a clean glass, the right angle, and thirty seconds of attention can turn the same keg into something remarkable.
Now go pour something worth drinking.
Sources: https://chesbrewco.com
Category: Beer