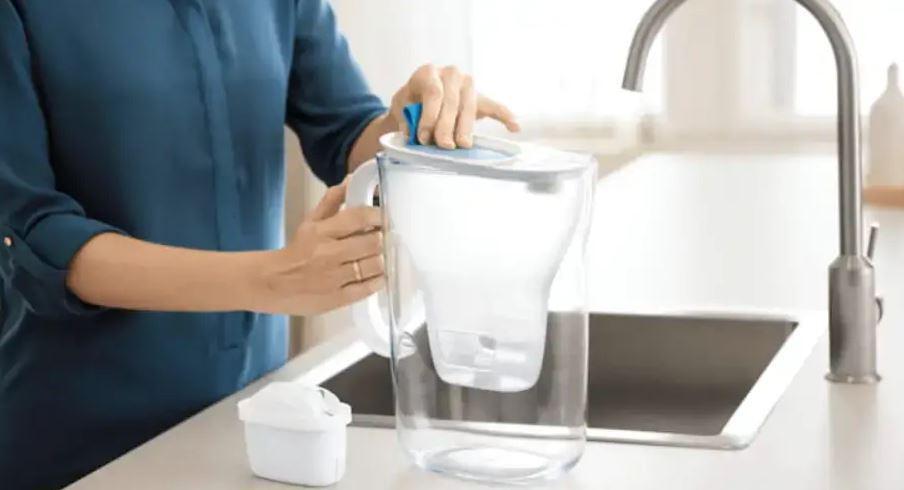
You reach for your Brita pitcher to make ice for tonight’s cocktail hour, and the little light on the lid is completely dark. No green glow, no blinking orange, just silence. If you’re the kind of American who takes their beer, wine, or home mixology seriously, that dead indicator light is more than a minor annoyance. It means you’ve lost your only visual cue for knowing whether your water is actually filtered, and in a hobby where water quality can make or break a pint of craft IPA or a perfectly balanced margarita, that matters a lot.
This guide covers everything you need to know about Brita Smart Light battery replacement: what the SmartLight actually is, the honest truth about whether you can replace the battery yourself, which models allow it and which ones don’t, a step-by-step process for those that do, troubleshooting tips, warranty options, and practical workarounds for when all else fails. We’ve also included some hard facts about why keeping your Brita filter properly maintained pays enormous dividends if you enjoy drinking beer, cocktails, or wine at home.
You Are Watching: Brita Smart Light Battery Replacement: The Complete Guide Every Home Brewer and Drink Lover Needs Updated 07/2026

What Is the Brita SmartLight and Why Does It Exist?
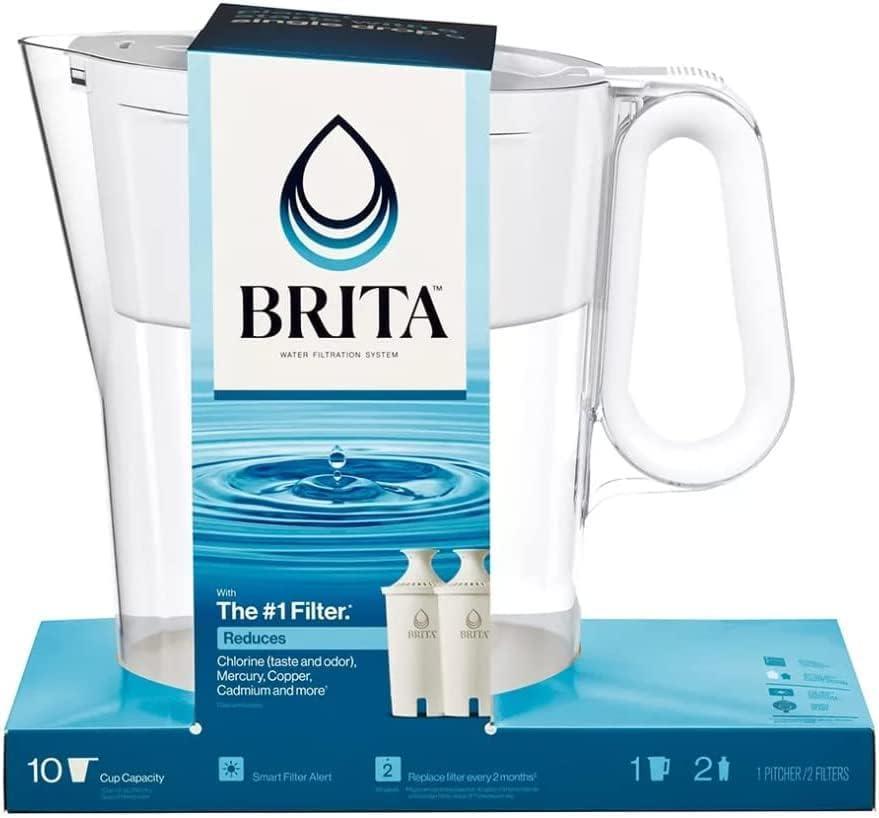
The Brita SmartLight is a small electronic filter-life indicator built into the lid of Brita water filter pitchers. It operates on a simple traffic-light system: a green light signals your filter is in good shape, a yellow or orange light tells you to order a replacement soon, and a red or blinking red light means the filter needs immediate swapping out.
The SmartLight doesn’t actually test your water chemistry. Instead, it uses a usage-based counting mechanism that tracks how many times the pitcher lid has been opened, essentially estimating gallons filtered based on average pour volume. Once the system counts enough uses to estimate that the filter is approaching the end of its rated life (typically 40 gallons for standard filters and up to 120 gallons for Brita’s Elite/LongLast filters), the indicator changes color.
The filter life indicator light works by measuring the number of times the pitcher is filled, and is activated when you open the pitcher lid for 5 to 8 seconds. The indicator turns red, orange, or green depending on the status of the filter.
It’s a clever, low-tech solution for a common problem: people forget to change their filters. For casual drinking water users, this is a convenient reminder. For beer homebrewers, cocktail enthusiasts, and wine lovers who depend on consistently clean water, this indicator is a critical part of a quality-control system.
The Big Question: Can You Actually Replace the Brita SmartLight Battery?
Here’s where things get complicated, and where a lot of online guides skip over the nuance. The honest answer is: it depends on your specific Brita pitcher model. There are two distinct situations, and confusing them can lead to frustration.
Sealed SmartLight Units (Most Modern Pitchers)
The majority of current Brita pitchers (including popular models like the Brita Everyday Elite, Brita Standard 10-Cup, and others released in the last several years) feature a sealed SmartLight unit. This means the battery is encased within the indicator module and was never designed to be accessed or replaced by the consumer.
The SmartLight is a sealed unit and cannot be replaced or repaired by the user.
According to Brita’s own consumer services team, in current models the batteries are not replaceable. All Brita pitchers have a 1-year warranty, and the battery is designed to last an average length of 5 years.
That 5-year estimate is optimistic. Real-world results vary dramatically. Some users report their battery died in as little as 6 months, while others have gone 9.5 years before seeing any issues. Most users seem to land somewhere in the 4-to-7-year range, which is roughly consistent with the manufacturer’s promise if you factor in normal variability.
Older Models and Some Current Variants (Accessible Battery Compartments)
Not every Brita pitcher is a sealed unit. A number of older Brita models, and some current variants particularly the Brita Marella Cool and certain international editions, feature a removable battery compartment on the underside of the indicator module or lid.
The Brita Marella Cool uses a CR2032 type battery. To change the battery, you open the battery compartment on the bottom of the digital display and replace the old battery with a new CR2032 battery, making sure the positive side of the battery is facing upward.
The battery for the indicator light on older Brita pitchers is usually located inside the lid, in a small removable section on the underside of the lid where the indicator light is located. A small screwdriver may be needed to open it, and the compartment will contain a small button cell battery, often a CR2032.
Which Battery Type Does the Brita SmartLight Use?
For pitchers where battery replacement is possible, the most common battery types are:
| Battery Type | Diameter | Thickness | Common Use |
|---|---|---|---|
| CR2032 | 20mm | 3.2mm | Most Brita indicators (primary type) |
| CR2025 | 20mm | 2.5mm | Some models, thinner variant |
| CR1616 | 16mm | 1.6mm | Older/smaller Brita models |
Different Brita models use different battery types. Some use CR2032 batteries, others might use CR2025.
The CR2032 is by far the most common and is available at virtually every grocery store, pharmacy, and hardware store in America for under $5 for a pack of two. It is the same battery used in car key fobs, watches, and many other small electronics, so you’ve probably got one lying around already.
Pro tip: Before buying a replacement battery, check your specific model’s user manual or look at the existing battery in the compartment (if accessible) to confirm the exact type. Using the wrong battery can damage the indicator circuit.
Step-by-Step: How to Replace the Battery in a Brita SmartLight (Accessible Models)
If you’ve confirmed your Brita pitcher has an accessible battery compartment, here’s the full process:
What You’ll Need
- A new CR2032 (or model-appropriate) coin cell battery
- A small flathead screwdriver or a coin (for prying the compartment cover)
- A clean, dry cloth (optional, for wiping contacts)
The Replacement Process
Step 1: Remove the lid from your Brita pitcher. Set the pitcher body aside in a clean, dry spot.
Step 2: Locate the battery compartment. On most accessible models, it sits on the underside of the lid, directly beneath the indicator light module. Look for a small circular or rectangular cover that can be twisted or pried open.
Read More : Bar Rescue Updates 2026: Which Bars Survived, Which Ones Didn’t? Updated 07/2026
Step 3: Open the compartment. Use a small flathead screwdriver, a coin, or even a firm fingernail to gently pry or twist the cover counterclockwise. This can be done by gently prying it off with your fingers or using a small tool like a screwdriver. Never force it; these are low-tension plastic clips, and applying too much pressure will crack the housing.
Step 4: Remove the old battery. Use a small non-metallic tool (a toothpick or wooden coffee stirrer works well) to pop the coin cell out. Avoid using metal tools that could scratch the contacts.
Step 5: Inspect the contacts. Over time, moisture can seep into the battery compartment through tiny gaps or worn seals. Once water gets inside, it can corrode the battery contacts or damage the small circuit board that controls the light. You might see green or white crusty buildup on the metal contacts. If you spot corrosion, gently clean the contacts with a dry cotton swab or a small amount of isopropyl alcohol before installing the new battery.
Step 6: Insert the new battery. Place the new CR2032 battery into the compartment, ensuring the positive (+) side is facing up, usually indicated by a small + symbol.
Step 7: Close the compartment. Press or twist the cover back into place until it clicks or seats securely.
Step 8: Reset the SmartLight indicator. Each time you install a new filter, you need to reset the indicator light. This tells the timer to start counting from zero again. The reset process varies by model, but it usually involves holding down a button for several seconds until the light blinks or changes color. On most pitchers, press and hold the Status or Start button on the lid for approximately 5 seconds until you see the green indicator flash, confirming a successful reset.
Step 9: Test the indicator. Open and close the pitcher lid a few times while observing the SmartLight. It should illuminate green, confirming the new battery is properly installed and the system is tracking normally.
What To Do When Your SmartLight Is Sealed and the Battery Is Dead
This is the reality most Americans face with modern Brita pitchers. The battery has died, the unit is sealed, and you’re wondering what your options are. Here’s the good news: you have more options than you think.
Option 1: Contact Brita Under Warranty
If your Brita filter is under warranty, you can contact Brita support and arrange to get the system replaced or repaired. Brita’s battery policy is unclear, but Brita advises reaching out to Customer Care if your battery stops working.
The official warranty covers one year from the date of purchase, but Brita has built a strong reputation for going beyond the stated terms. At least one verified customer reported that after purchasing a Brita Everyday Elite pitcher in May 2023 and having the indicator stop working in February 2025 (well past the one-year mark), Brita replied that although the warranty had expired, they would love to replace the pitcher as a courtesy, because their loyalty means a lot and they want to continue reducing plastic waste together. The customer received a full replacement pitcher that included an Elite water filter.
That’s exceptional customer service, and it’s consistent with Brita’s general brand reputation. When you reach out, have the following ready:
- The exact model number (found on the bottom of the pitcher)
- Your purchase date and purchase price
- Your shipping address
- A brief description of the issue
You can reach Brita Customer Care at 1-800-24-BRITA or through the contact form at brita.com/support.
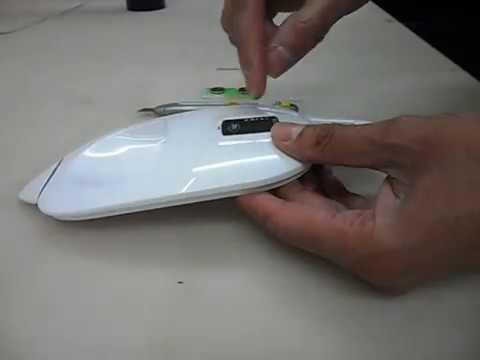
Option 2: DIY Battery Extraction (Advanced Users Only)
Some enterprising users have carefully pried apart sealed SmartLight indicator units using thin plastic spudgers (the kind used for phone screen repairs), replaced the internal CR2032 battery, and reassembled the unit with electrical tape or craft glue. At least one user reported successfully installing a new battery in each of two 10-cup pitcher indicators and saving the cost of buying entirely new pitchers.
This is a technically feasible but risky approach. You risk cracking the housing, breaking the internal circuit board, or voiding any remaining warranty coverage. If you’re comfortable with basic electronics disassembly (think: replacing an iPhone screen), the skill level is similar. If not, skip this and go straight to warranty or replacement.
Option 3: Use the Pitcher Without the Indicator
You can continue using your Brita pitcher without the SmartLight; it just means you’ll need to monitor filter changes manually. The Brita Everyday Elite filter typically lasts around six months or up to 120 gallons of water, whichever comes first.
This is the simplest short-term workaround. Set a recurring calendar reminder on your phone for every 2 months (for standard filters) or every 6 months (for Elite/LongLast filters). Some users simply write the replacement date on the filter itself with a permanent marker. One practical workaround is to mark the date on the filter so you know when to replace it.
Troubleshooting the Brita SmartLight: Common Problems and Fixes
Even before the battery completely dies, the SmartLight can behave oddly. Here’s a practical troubleshooting guide:
The SmartLight Won’t Reset After a Filter Change
This is one of the most frequent complaints. You’ve just installed a fresh filter, but the light is still blinking red. If it still blinks or won’t reset, try pressing and holding the reset button for 5 to 10 seconds after installing both the new filter and battery. If issues persist, refer to your specific model’s manual, as some older indicators are sealed units.
Make sure the new filter is fully seated before attempting a reset. The indicator on some models won’t accept a reset command if the filter isn’t properly locked into position.
The SmartLight Worked Out of the Box, Then Stopped
If the SmartLight indicator does not illuminate at all even momentarily right out of the box with the included filter, and there’s no option to access or replace the battery, it typically indicates that the SmartLight assembly is defective. The SmartLight is a sealed, non-serviceable unit. If it’s non-functional when new, it cannot be repaired or reset. Contact Brita immediately for a warranty replacement.
The SmartLight Is Dim or Flickering
Dim or flickering is often an early sign of a weakening battery (in accessible models) or moisture intrusion. Moisture can seep into the battery compartment through tiny gaps or worn seals. Once water gets inside, it can corrode the battery contacts or damage the small circuit board. If the compartment is accessible, open it up and inspect the contacts. Wipe with a dry cotton swab and ensure the cover is properly sealed after reassembly.
The Light Shows Red Immediately After a Fresh Filter Install
If the indicator flashes but won’t stay lit, try resetting by pressing and holding the button for 5 seconds. If the red light persists after resetting, the issue may be the indicator’s internal count register, not the filter itself. A full reset (removing and reinserting the battery on accessible models, or pressing the reset button for a full 10 seconds on sealed models) usually resolves this.
Why Clean, Filtered Water Matters So Much If You Drink Beer, Cocktails, or Wine
Here’s the part that makes all of this genuinely relevant to your lifestyle, not just a household maintenance chore.
Beer Is 90 to 95 Percent Water
Since beer is around 95% water, it is natural that the quality and mineral composition of the water has a large impact on the flavor. Two important elements of water will affect the taste of the beer: mineral composition and pH. Water’s hardness and mineral makeup will infuse flavor and greatly influence the fermentation process.
Read More : How Much Caffeine Is In G Fuel Updated 07/2026
If you’re a homebrewer or even just someone who cares about the quality of water you’re using to rinse glasses or dilute spirits, an expired Brita filter is silently degrading your results. An overdue filter doesn’t just fail to remove contaminants, it can actually release trapped sediment and accumulated chlorine back into your water.
Since chlorine is one of the biggest taste offenders in brewing, and since it is so widely used by water municipalities, reducing the chlorine content of your water is the least you can do to elevate your homebrewing.
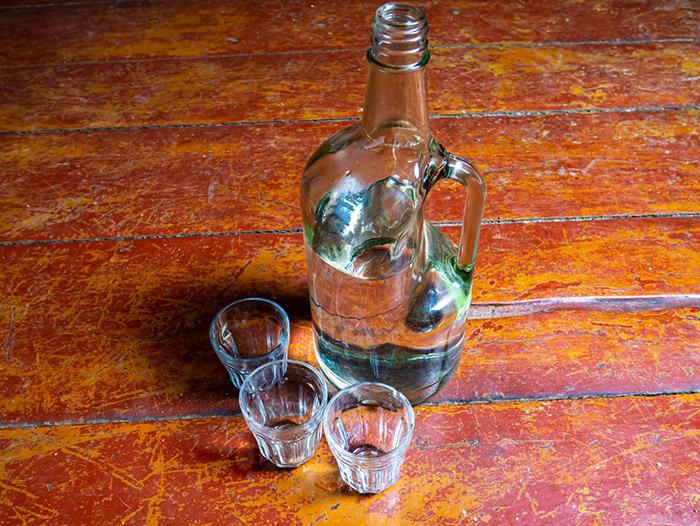
Cocktails Suffer When Your Water Quality Does
Whether it’s water added through ice or if you are in the process of home brewing, water quality can take away the enjoyment and aromas of your cocktail or alcoholic beverage. Hard water impacts nearly 90% of homes in the United States and Canada, meaning that magnesium, calcium, sulfides, and other contaminants could be running through your plumbing system, affecting your health, cooking, and even your cocktail.
Think about it: when you make ice for a whiskey on the rocks, a mojito, or a gin and tonic, that ice is almost entirely water. If your Brita filter has been sitting with a dead indicator and an expired cartridge for months, every cube of ice in your cocktail is carrying unfiltered tap water straight into your glass. Professional mixologists account for this. Several mixologists completely filter the water of contaminants and reconfigure the balance of magnesium and calcium to find the perfect balance for their craft.
The Mineral Breakdown: What’s Really in Your Tap Water
Understanding what your Brita filter is actually removing puts the stakes in perspective:
| Contaminant | Effect on Beer/Cocktails | Brita Removal |
|---|---|---|
| Chlorine | Kills yeast, creates off-flavors, destroys aroma | Yes (activated carbon) |
| Chloramine | Similar to chlorine, harder to remove | Partial (Standard), Better (Elite) |
| Lead | Metallic taste, health hazard | Yes (NSF certified) |
| Copper | Metallic or blood-like notes at low levels | Yes |
| Sediment | Cloudiness, bitter aftertaste | Yes |
| VOCs | Chemical off-flavors | Yes (activated carbon) |
| Calcium/Magnesium | Affects mouthfeel and fermentation | Partial |
It’s vital to make sure problematic contaminants like manganese or iron are filtered out of the water, as these can mess with your beer’s flavors.
Ice Clarity for the Perfect Pour
Clear ice is a hallmark of a well-made cocktail. Cloudy, white ice cubes (the kind most home freezers produce) are filled with dissolved gases and minerals. When your Brita filter is functioning correctly, boiling filtered water and letting it cool completely before freezing removes contaminants that cause cloudiness and other elements that create a sour taste and smell in cocktails. Even without boiling, properly filtered water produces noticeably clearer, slower-melting ice than straight tap water.
Brita SmartLight Models Comparison: What You’re Working With
Not all Brita pitchers are created equal, and the SmartLight system varies meaningfully across the lineup. Here’s how the major current U.S. models stack up:
| Model | Capacity | Filter Type | SmartLight | Battery Accessible? | Filter Lifespan |
|---|---|---|---|---|---|
| Brita Metro | 5 cups | Standard | Yes | Sealed | 40 gallons (2 months) |
| Brita Standard 10-Cup | 10 cups | Standard | Yes | Sealed | 40 gallons (2 months) |
| Brita Everyday Elite | 10 cups | Elite/LongLast | Yes | Sealed | 120 gallons (6 months) |
| Brita Large 18-Cup | 18 cups | Standard or Elite | Yes | Sealed | 40 or 120 gallons |
| Brita Marella Cool | Various | Maxtra+ | Yes | Accessible (CR2032) | 150 liters |
| Older Brita models (pre-2018) | Various | Standard | Yes | Often Accessible | 40 gallons |
The Marella Cool, sold primarily outside the U.S. but available through import retailers on Amazon, is notable for being explicitly designed for user battery replacement, making it a preferred choice for technically minded users who find sealed units frustrating.
Preventing SmartLight Battery Failure: Practical Maintenance Tips
You can extend the life of your Brita SmartLight battery with a few simple habits:
Keep the lid dry. Water is the primary enemy of the SmartLight’s electronics. After filling the pitcher, avoid letting water pool on the lid. A quick wipe with a dry cloth keeps moisture from working into the indicator module over time.
Avoid submerging the lid. When cleaning your Brita pitcher, remove the lid and wash it gently by hand. The SmartLight module is not waterproof despite being positioned at the water’s edge.
Store it at room temperature. Extreme cold (like leaving your Brita in an unheated garage during winter) can prematurely drain coin cell batteries. Lithium-based CR2032 cells handle cold better than alkaline batteries, but repeated freeze-thaw cycles still degrade performance.
Don’t ignore a sluggish light. If the SmartLight seems dim or takes longer to activate than it used to, that’s your early warning. On accessible models, this is the ideal time to proactively replace the battery, before it fails mid-brew session.
Register your pitcher. Brita’s warranty process is much smoother when they have your purchase on record. Keep your receipt or register at brita.com so that when you contact them about a failing indicator, the process moves quickly.
Smarter Alternatives if the SmartLight Keeps Letting You Down
If you’ve had repeated SmartLight failures and you’re tired of the cycle, it may be time to consider a longer-term hydration upgrade. For serious beer and cocktail enthusiasts, these options offer more reliability:
Phone-based filter tracking apps. Free apps like FilterSmart or even a basic calendar reminder can replicate the SmartLight’s function without any battery to die. Simply set a repeating reminder every 40 gallons (roughly 2 months of typical daily use) and you’ll never miss a filter change.
Upgrade to a countertop or under-sink filter system. Products like the Brita Hub countertop system or a basic under-sink carbon filter provide significantly higher filtration capacity with filter lives measured in years, not months. For homebrewers who go through 5 to 7 gallons of water per batch, the math on cost-per-gallon heavily favors under-sink systems over pitcher filters.
Reverse osmosis for serious brewers. Reverse osmosis provides consistency across batches. If you are starting from the same base level of high purity each time, any recipe you’ve worked hard to perfect will come out tasting the same every time. RO systems start around $150 for a basic unit and can reduce up to 98% of contaminants, giving homebrewers a true “blank canvas” water profile to work with.
The Bottom Line on Brita Smart Light Battery Replacement
The Brita SmartLight battery replacement situation is genuinely more nuanced than most people expect. On modern sealed pitchers, direct user replacement isn’t possible as designed, but you’re far from helpless. Brita’s customer service is notably generous, the 1-year warranty is a real safety net, and many users have reported courtesy replacements even years after purchase.
If you’re experiencing issues with the Brita SmartLight battery indicator not working, it’s important to check your warranty for possible replacement options. If it stops working within a few years of use, it may be covered under warranty.
For those with older or international-model Brita pitchers featuring accessible battery compartments, a CR2032 coin cell battery (under $3 at any pharmacy) and a five-minute effort is genuinely all it takes. Follow the steps above, reset the indicator, and you’re back in business.
Most importantly, for anyone who cares about the taste of their beer, the clarity of their cocktail ice, or the clean finish of a glass of wine poured over filtered water, keeping your Brita filter properly tracked and replaced is not optional maintenance. It’s a fundamental part of drinking well. Don’t let a dead battery light be the reason your next batch of homebrew tastes like tap water.
Have questions about your specific Brita model or battery type? Brita’s Consumer Care team can be reached at 1-800-24-BRITA (1-800-242-7482), Monday through Friday, 9 AM to 6 PM EST. Their support page at brita.com/support also includes model-specific manuals, warranty claim forms, and filter change guides.
Sources: https://chesbrewco.com
Category: Drink